Friday, January 18, 2013

Ice Queen Mask 3rd Attempt! (Possibly Final)


To Those new to reading this, I ask you to please visit, this Blog First:  **1st Attempt**
Then Follow up 
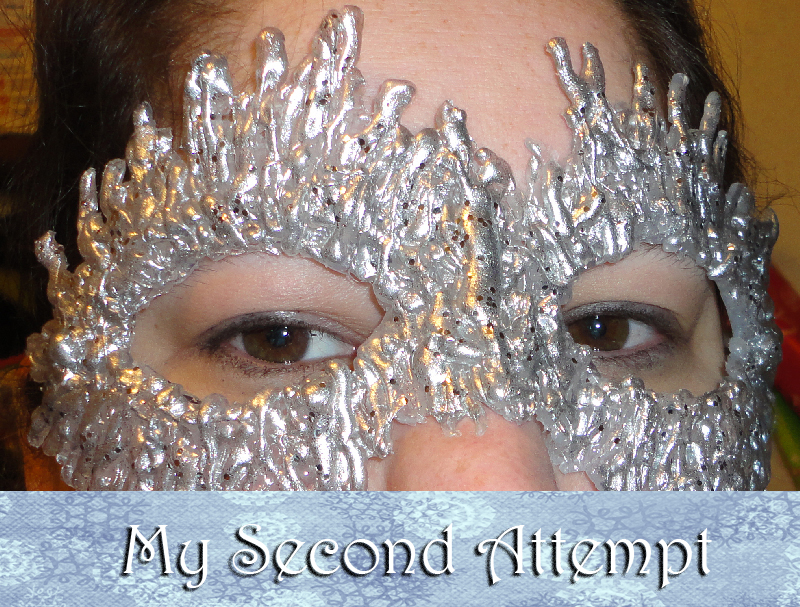
with the Next Vlog **2nd Attempt**

Now that you've been refreshed on my past attempts, which didn't turn out to bad.  I give you the steps at my 3rd Attempt.  I bought a Full female face mask from The Spirit Store.  

*kinda creepy huh?*

I tested it with the hot glue on a cheek and let it cool.  It Peeled off Ok, litte bit of tugging,  was a bit of a hassle really.  So I had the bright idea of smearing a little bit of lotion on the other cheek and trying a test with the hot glue. *Insert Chore singing*  That peeled off rather easily. So then after coating the area around the eyes with lotion, I began again on a new mask. It came out pretty darn nice.  There was a spot where it was difficult to peel off the mask, but not time consuming like the first two attempts. 


I did the same painting from my 2nd Attempt for this one, and while you can't see it, there is a hint of blue on the edges.

Paraphrasing:
"That's It I'm Done :) "

Sunday, January 13, 2013

WOW WAXELENE!!


I know my little blog won't mean a lot to anyone but the small few that do read it.  Still I wanted to share this product with you!  I've recently been getting a Conscious Box  from http://www.consciousbox.com/  they give you this wonderful box with an inspirational card and products that are more green.  They stuff it with Samples of Food, snacks, supplements, beauty products, and more!!  This last conscious box I've been enjoying very much! There's a pack of Brownies to make that are microwavable!!  

HOWEVER!! I'm wanting to Promote (Without sponsorship)  Waxelene!  it's a natural alternative to Petroleum Jelly (a.k.a. Vaseline)  It's ingredients are listed as Organic Soy Oil,  Beeswax, Natural Vitamin E Oil, Organic Rosemary Oil.    That's it!!  No strange words that take 5 minutes to decipher!  and let me tell you it smells just a little like Honey!!  It also feels GREAT!!  Not too greasy but a light film on the skin, but it feels good, NOT greasy!!

I LOVE IT!!  OMG!!  I will be ordering this in the future!!  I also wish I could get these little sample packs so I can give them out to friends!!  Well That's all I wanted to rave about for now!

I will be posting the results soon of my 3rd attempt of the "DIY ice Queen Mask"  from my previous Blogs.  I am REALLY pleased this time!

Tuesday, January 8, 2013

Scrapping For facebook friends!

I get moods for different crafty or creative things. I got crafty with my Facebook Cover Image. I used a kit called "Oceans Five" it was one of many from a Blog Train of Digital Scrapbook ladies.  I had to remember to put the name more to the top and to the right since the Facebook Profile picture overlaps it.  The one i picked was by TootyPup Scraps.  Here's what I did for my Facebook:


A few different Scrap creators later I came up with these.  I'll Put links to their respective pages under the images if i can remmeber.  They do on occation offer free kits and such, so follow them and keep up with their Projects!


Ladybug Ladybug Add-On Freebie for the moment


Shell Belle Scraps Store Link


Thursday, January 3, 2013

UPDATE: DIY Ice Queen Mask

**See Previous Blog**

OK So I went out and did some shopping around.  Mostly I was after Eye Primer, E.l.f. eye primer to be specific.  I can't find it anywhere but online. *grumbles*  But I did find this lightly iridescent sky blue nail polish by SinfulColors called "Cinderella" 1106  I got a thought and bought it for $1.98.   This morning I pulled out the first mask I attempted seen here:


I pulled out the other nail polishes by L.A. Colors and the "Cinderella" Color:


So starting out I brushed the "Sassy Sparkle" (it's an iridescent fine glitter without color) from the edges of the eye holes brushing out, keeping it thicker around the edges of the eyes. Then I used the "Sparkling Diamond” and used it all over. This was before I bought the "Cinderella" and I felt the mask needed something more.   Which is why I was out looking at Light blue nail Polish.  So using the "Cinderella” I started on the Outer edges of the Mask and brush it towards the eyes but not completely, I also made sure to brush it where it was barely seen.  I let that dry and reapplied more "Sparkling Diamond” over it. Here is what it looks like with and without the flash. With Flash shows the blue better.


Here it is Fully with and Without Flash for comparison.


Overall I like the painting on this one better than the 2nd one I made. (see previous blog)
That's it For now!  


Wednesday, January 2, 2013

My Attempts at DIY Ice Queen Mask by KlaireDeLys


OK so i love watching DIY vlogs/blogs. One that's I've stuck with and watched is by a Very Pretty and talented young girl named Klaire on YouTube. You can find her pages here:

Channel #1

Channel #2

And lastly her Blog

I recently watched Her Vlog on the 2nd Channel on the DIY Ice Queen Mask  And decided I'd try my hand at remaking it.  I don't have a cast of my head so I used a styrofoam Head.  It was trial and Error since the Glue didn't want to come off the mask. I then used plain clear packing tape over the head, that worked better but it was still hard to pick the mask off the tape.  So I bought some plain white masks and then used the tape.  Same problem, it was hard to pick the mask off, even harder if it was glued to the mask itself.  So I finally got what she suggested on her Blog page and got a Female Mask.  That will be attempt #3, for now here are the Attempts so far.

Just Glue without any paint or rhine stones
I had to trim the edges to because it was uneven.


I'm happy with this one, but I will eventually do another one.